
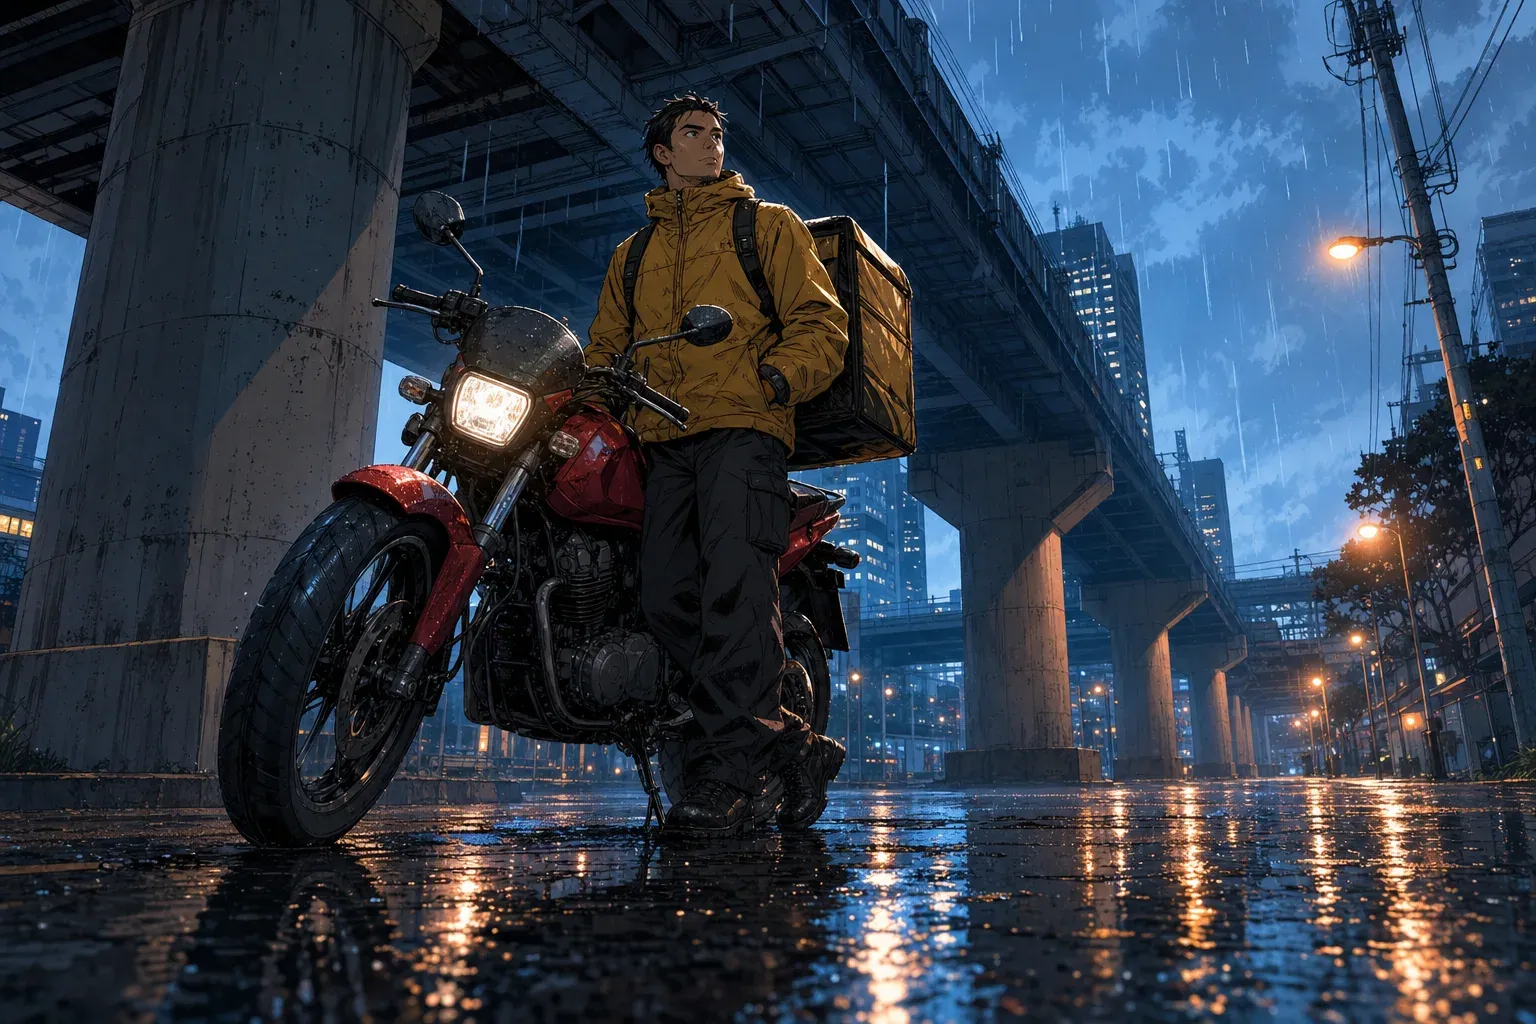
Low angle
Full shot · Subtle wide · Leading lines
The ground-level camera enlarges the motorcycle wheel and gives the rail structure more height.
Describe a scene or upload a reference, then choose the camera angle, shot size, perspective, and composition. Generate one reviewable frame for a comic panel, storyboard beat, character scene, or visual pitch.
Describe what stays in the frame; use the controls for how the camera sees it.
222/1400
Camera angle examples
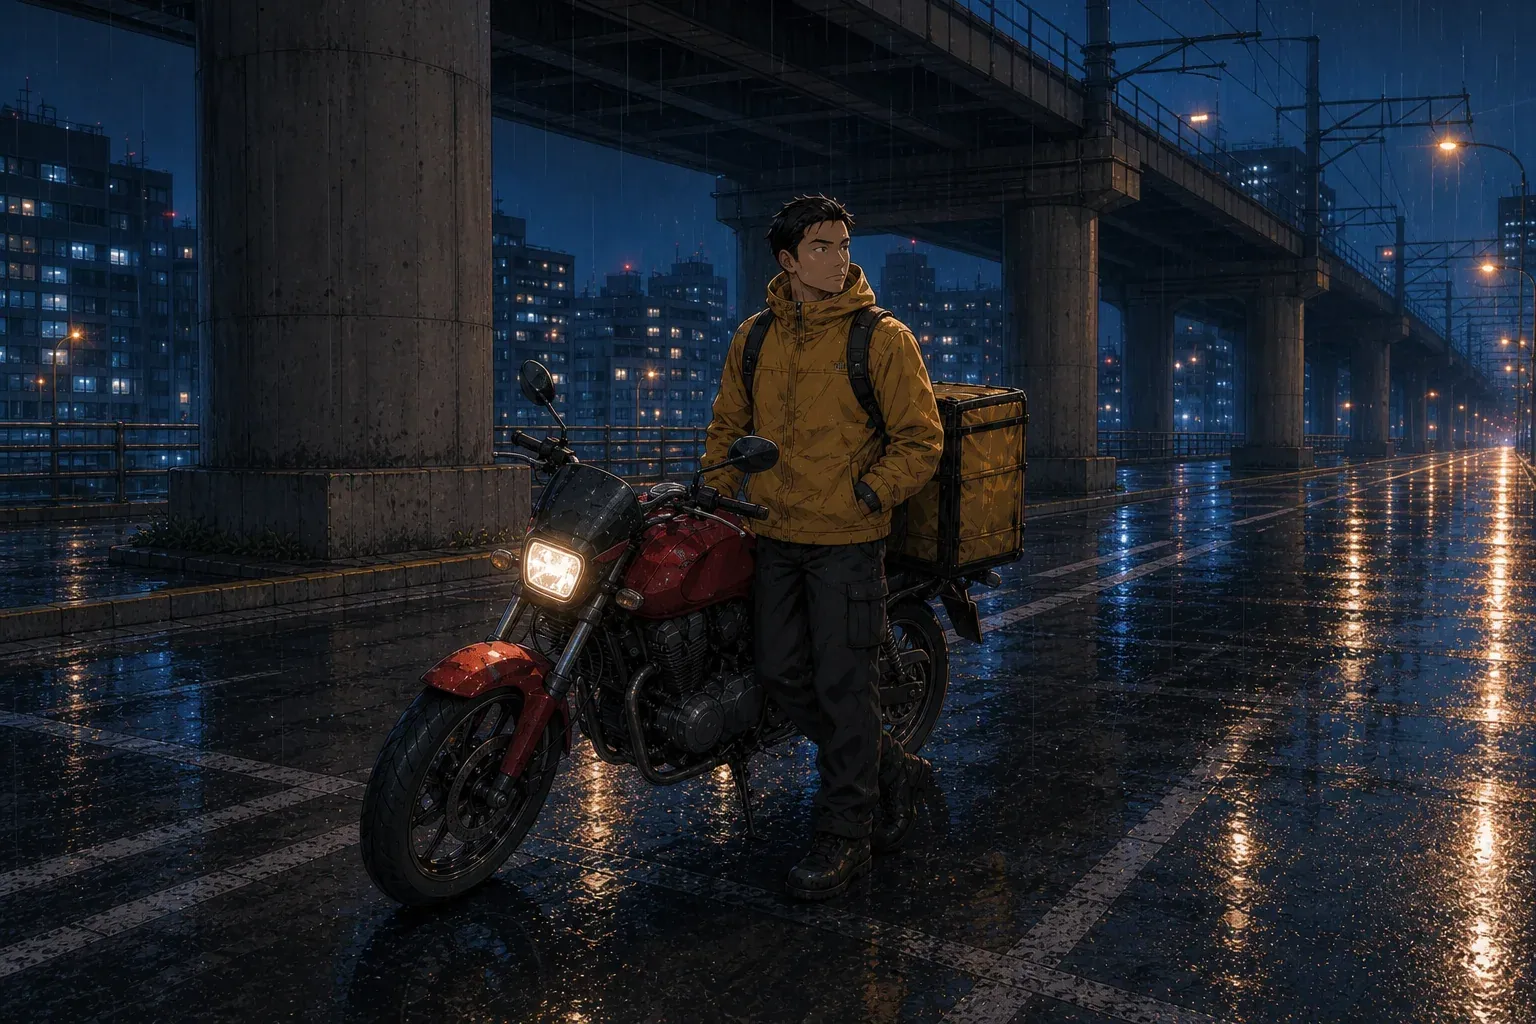
These three curated frames keep the adult courier, mustard jacket, red motorcycle, rainy underpass, blue-hour lighting, and graphic-novel rendering direction stable. The useful difference is the camera position and framing—not a new character or unrelated scene.
Full shot · Subtle wide · Leading lines
The ground-level camera enlarges the motorcycle wheel and gives the rail structure more height.
Full shot · Natural · Rule of thirds
The neutral camera keeps the courier, motorcycle, and setting readable without strong distortion.
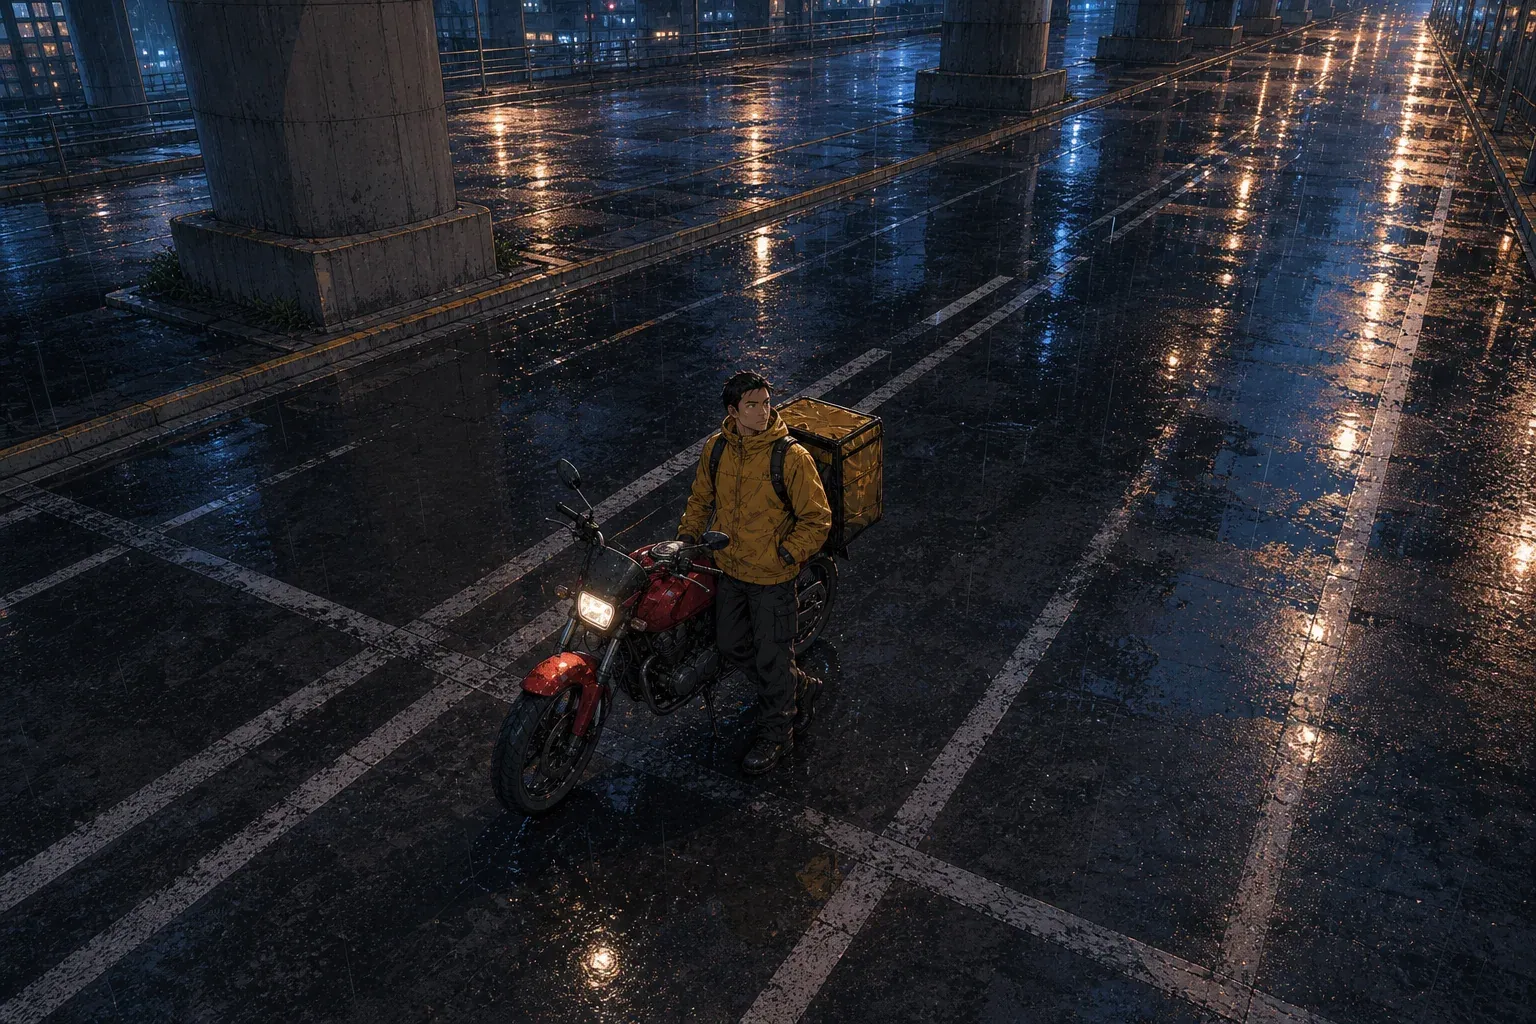
Wide shot · Natural · Leading lines
The elevated camera reveals road markings, empty space, and the subject's position inside the location.
Camera direction
AI camera angle control is the task of directing where a virtual camera sits in relation to the subject, which way it points, how much of the scene it includes, and how perspective behaves. Those choices change the meaning of an image before lighting, color, or rendering style are considered. An eye-level view can make a conversation feel direct. A low camera can give a person or machine more weight. A high camera can reveal geography, distance, or vulnerability. The control is useful only when the generated frame actually follows the requested viewpoint instead of treating camera words as decoration.
The tool separates four decisions that are often mixed together in one prompt. Camera angle describes vertical position and tilt. Shot size describes how tightly the subject is framed. Perspective describes the apparent depth and scale relationship between near and far objects. Composition describes where the subject sits and how the viewer's eye moves through the frame. Choosing these fields separately produces a clearer instruction than asking for a generic cinematic image.
Start with the story function of the frame. If the panel must introduce a location, choose a wide shot and leave enough environment around the character. If the panel must show a reaction, choose a close-up and use eye level unless the story needs a power imbalance. If an action beat depends on a drop, staircase, crowd, or route through a room, use a high angle or overhead view so the spatial relationship is visible. Camera direction should solve a reading problem, not merely make the frame look unusual.
A text-only job builds the scene from your written brief. A reference-image job recomposes an existing subject and art direction from a new viewpoint. In reference mode, state what must remain recognizable: the character's face and hair, jacket, vehicle, prop, room layout, or palette. The output is a new flat image, not a three-dimensional rotation of the source, so details hidden in the reference still have to be inferred and must be reviewed.
Vertical viewpoint
Eye level is the reliable baseline. The horizon sits around the subject's eye line and the viewer feels present in the same space. Use it for dialogue, character introductions, product-like reference views, and scenes where the camera should not comment strongly on status. Eye level does not mean flat: you can still use a close-up, wide shot, leading lines, foreground objects, or compressed perspective while keeping a neutral vertical relationship.
A low-angle view places the camera below the main subject and points it upward. It makes vertical structures converge, enlarges nearby feet, wheels, or foreground objects, and gives the sky or ceiling more space. In a comic, use it when a character enters with authority, a vehicle feels heavy, a building should tower, or a reveal needs visual force. Name the ground-level foreground and request a full or wide shot if the entire figure must remain visible; otherwise the generator may crop the feet or turn the result into a close portrait.
A high-angle view places the camera above the subject and looks downward. It can show a route across a room, separate a person from a crowd, expose objects on a table, or make a figure feel contained by the environment. High angle is not the same as overhead. A high-angle camera still sees the front or side planes of the subject, while an overhead camera approaches a vertical top-down view. Choose overhead only when floor plan, movement pattern, or object placement matters more than facial expression.
Worm's-eye and Dutch-angle options are stronger interventions. Worm's-eye puts the camera extremely close to the ground and creates pronounced foreshortening. A Dutch angle tilts the horizon to introduce instability. Both can be useful for impact panels, panic, imbalance, or mechanical scale, but they also make anatomy and background geometry harder. Test the idea with a simpler pose and a readable subject before adding multiple characters, flying objects, or dense architecture.
Framing and depth
Shot size answers a practical question: how much information must the reader see in this frame? A close-up prioritizes a face, hand, clue, or object. A medium shot usually carries dialogue and gesture because it keeps the upper body readable. A full shot shows the complete person or object and is useful for costume, stance, and physical action. A wide shot establishes environment, distance, entrances, exits, and the relationship between characters and architecture.
Do not use shot-size terms as mood adjectives. If you choose a wide shot, describe the environment that earns the extra space: flooded alley, station platform, workshop floor, rooftop edge, or classroom rows. If you choose a close-up, name the exact focal detail and what can be cropped. A request such as close-up of the courier's gloved hand tightening the red motorcycle mirror is more controllable than dramatic close-up of a courier.
Perspective controls apparent depth rather than camera height. Natural perspective keeps proportions restrained and works for most dialogue and continuity panels. Subtle wide angle increases the separation between foreground and background without dominating the scene. Dramatic wide angle makes nearby objects much larger and strengthens foreshortening; it suits speed, impact, and immersive establishing frames but can distort faces near the edge. Compressed perspective reduces the apparent distance between planes and can make a crowd, skyline, or approaching vehicle feel denser.
Composition should support the next reading action. Centered composition is clear for reveals, references, and symmetrical spaces. Rule of thirds leaves look room and space for dialogue or an approaching object. Leading lines use roads, rails, shelves, beams, or shadows to guide the eye. Over-the-shoulder composition establishes a relationship between an observer in the foreground and a focal subject beyond. If you plan to add speech balloons later, mention clean negative space in the brief and place it away from faces and key action.
Continuity workflow
Changing the camera while keeping a character recognizable is harder than generating a new scene because the model must infer unseen surfaces. A front portrait does not show the back of a jacket, the far side of a hairstyle, footwear, or the shape of a bag from above. Before producing a sequence, approve a reference that clearly shows the stable identity features and write a short continuity block: age range, face shape, hair cut and color, outer layer, inner layer, lower garment, footwear, signature object, and two or three palette colors.
Upload the approved character image and repeat only the details that cannot drift. Then describe the new scene and camera separately. For example: preserve the courier's short dark hair, mustard rain jacket, black cargo trousers, square delivery pack, and red motorcycle. New frame: high-angle wide shot beneath an elevated rail line, natural perspective, leading lines from wet road markings. This structure makes it easier to compare the output with the reference and identify which instruction caused an unwanted redesign.
Change one camera variable at a time when continuity matters. Generate the eye-level baseline first, then switch only the angle while keeping shot size, perspective, composition, setting, pose, lighting, and palette stable. After the angle works, adjust the shot size. This staged method costs more iterations than asking for every change at once, but it gives you a usable diagnosis when the face, outfit, prop, or environment shifts.
Consistency is an editorial review, not a guarantee. Compare face proportions, hair part, jacket closures, pockets, logos, hand count, prop shape, color, and left-right orientation at full resolution. A high or overhead angle may hide the face, so continuity may depend more on silhouette, clothing, and signature props. Keep the approved prompt and images together so later storyboard or comic-panel work starts from the same evidence.
Production workflow
Treat the first generation as a camera test, not automatically as finished comic art. The workflow below keeps costly changes visible and gives collaborators a clear reason for each revision.
Write the subject, setting, stable identity details, important prop shapes, palette, and art direction. Upload a clear reference when those details already exist visually.
Select angle, shot size, perspective, and composition. Begin with natural perspective unless distortion is part of the storytelling goal.
Sign in when you are ready to generate. The selected controls and reference are attached to one private image job, and the page shows its progress until the new camera view is ready.
Check whether horizon, scale, crop, face, clothing, props, hands, background geometry, and left-right relationships match the brief. Download the PNG only after reviewing it at full size.
If the result misses, keep the scene stable and change only the failed variable. A smaller controlled revision is easier to diagnose than rewriting the entire prompt.
Limits and troubleshooting
Remove conflicting camera language from the scene brief, keep one subject, choose a full or wide shot, and name a physical camera location such as near the wet pavement looking upward. Simplify complex poses and architecture until the horizon and subject relationship are correct.
Use the clearest approved reference, repeat a short continuity block, and avoid asking for a costume redesign in the same job. A new angle reveals surfaces absent from the source, so check inferred details and repair them in an illustration editor when exact continuity is required.
Switch from dramatic wide to subtle wide or natural perspective, move the face away from the image edge, and reduce extreme foreshortening. Keep hands and feet out of the nearest foreground unless their scale is intentional.
The completed output is one downloadable PNG. It does not contain separate character, background, camera, depth, or balloon layers. Keep working files and references outside this page, and plan lettering or panel assembly in a dedicated comic workflow.
Connected comic workflow
Create and approve a readable character reference before testing that character from low, high, or overhead camera positions.
Open toolTake an approved camera-directed frame into panel planning with scene beats, dialogue space, and sequential reading order.
Open toolFAQ
It is a way to direct the virtual camera position, shot size, perspective, and composition of a generated image. This page turns those decisions into separate controls and combines them with your scene or reference image.
You can upload a PNG, JPG, or WebP under 5MB and request a new viewpoint. The result is a newly generated image that follows the reference subject and art direction; it does not rotate a true 3D model, so unseen details are inferred.
A high angle looks downward while retaining visible side or front planes. Overhead approaches a straight top-down view and is better for floor plans, object placement, crowds, routes, and spatial blocking.
A medium shot is a practical starting point because it keeps facial expression, upper-body gesture, and some environment visible. Use a close-up for a decisive reaction and a wide shot when location or distance carries the story beat.
Upload the approved reference and repeat the stable identity traits: face, hair, clothing layers, footwear, signature prop, proportions, and palette. Change one camera setting at a time and review every output for drift.
Low cameras and wide perspective increase foreshortening, especially near image edges. Choose natural or subtle-wide perspective, keep the face away from the edge, and reduce the difference between camera height and face height.
You can prepare the scene and camera settings before signing in. Sign-in is required to queue a generation, apply the credit charge, track private progress, refund a final failed job, and return the completed image to your account.
A completed job provides one downloadable PNG. It is a flat image, not a layered illustration, 3D scene, depth map, camera file, or editable storyboard project.