Comics Maker
Open navigation
Resources
Anime character creatorCreate an original anime character from text or a reference image.Manga translatorAI manga image translator pageComic translatorComic page translator workflowComic Script MakerPlan pages, panels, dialogue cues, captions, SFX, and art prompts.Manhwa CropperSplit a long manhwa or webtoon image into reviewed PNG or JPG slices and download an ordered ZIP.AI storyboard generatorBreak a scene into purposeful shots, revise camera and continuity notes, generate selected frame drafts with the project’s live image pipeline, then export the working board.Plot generatorDefine the protagonist, central conflict, audience, length, tone, and ending. Generate a structured premise, major beats, turning points, and scene-by-scene outline on this page.AI character creatorTurn scattered character ideas into an editable design specification for games, animation, illustration, brand concepts, and story pitches. Approve the identity, wardrobe, palette, and pose first; generate one concept image second.Storybook makerPlan a children's story, teaching story, or family memory as a sequence of readable pages. Edit the text and art direction, then generate and download individual page illustrations.AI character designBuild a reviewable character design brief, turn it into an editable specification, and generate one concept image to check the silhouette, outfit, palette, and pose.AI character sheet generatorDefine identity anchors, outfit construction, palette, props, and requested views, then generate one clearly labeled concept character sheet for visual development.AI character pose generatorPlan line of action, balance, camera view, hand visibility, and framing, then generate one reviewable character pose concept as a downloadable PNG.Character expression sheet generatorPlan a character expression sheet from identity anchors, emotion beats, intensity, head angles, style, and grid requirements, then generate one downloadable raster concept sheet.AI background generatorTurn a structured location, weather, perspective, depth, staging-space, style, and aspect brief into one downloadable comic or anime background image.

AI background generator

AI background generator for comic and anime locations

Plan the location before you prompt it. Define the setting, light, weather, camera, focal depth, character-safe staging space, rendering language, and panel ratio; review the exact brief; then generate one raster background without leaving this page.

Seven production fieldsOne real raster image jobNo false PSD or 3D claim

Step 1 · Environment direction

Describe a location that can support a panel

225/1000

Name physical structure, pathways, materials, entrances, and three repeatable landmarks.

123/650

State temporary conditions, key-light direction, surface effects, and what must stay readable.

131/650

Choose eye level, shot scale, horizon, one- or two-point perspective, and avoid conflicting lens language.

118/500

Explain what stays sharp in the foreground, staging plane, and distance.

178/700

Name the exact region reserved for figures or balloons and what detail should stay out.

129/600

Describe line, paint, texture, value grouping, and palette without naming a living artist or franchise.

Step 2 · Review and generate

Editable background specification

Describe a location that can support a panel

No generated result yet

Only an image returned by the existing generation queue appears here.

Direct answer

What is an AI background generator?

An AI background generator converts written environmental direction into a flat raster scene. This page is specifically for comic and anime production: it asks for repeatable location anchors, a deliberate perspective, readable depth, and space where characters or balloons can be added later. The result can help with visual development and panel planning, but it is not a layered PSD, editable 3D set, measured architectural drawing, or guarantee that separately generated camera angles will match exactly.

Curated background proof

Three environment briefs with visible staging decisions

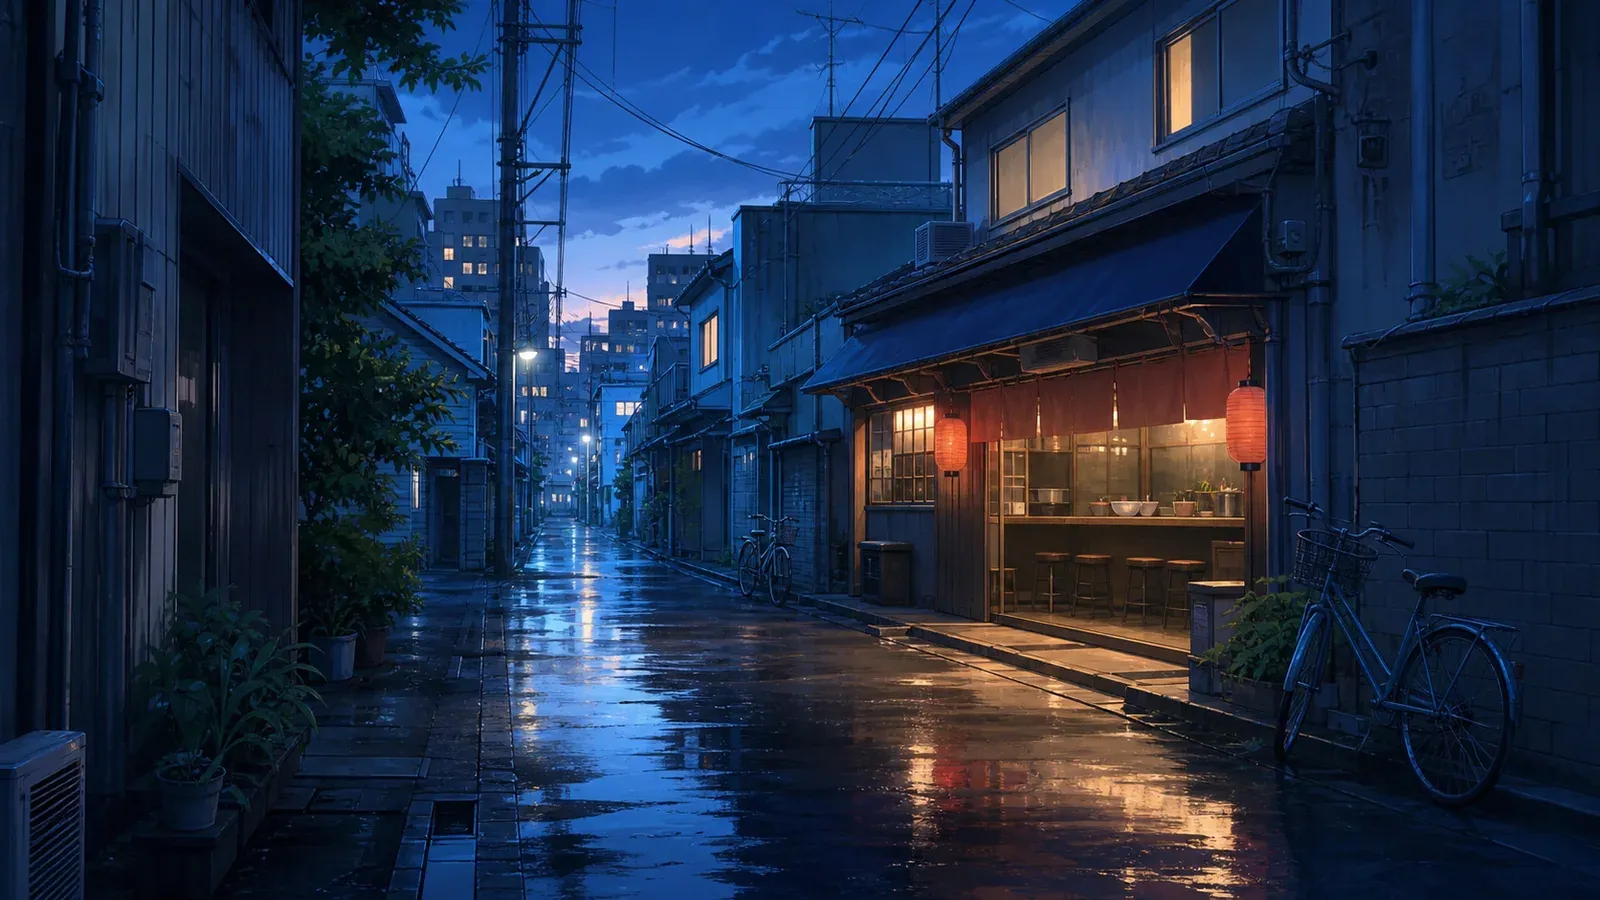
Empty blue-hour anime alley background with wet pavement and open foreground staging space

Eye level · one-point perspective · deep focus · rainy blue hour · 16:9

Rain alley establishing shot

The prompt fixes eye level, one-point perspective, blue-hour rain, warm shop light, and a clear lower-center lane. Those constraints make the environment useful behind a walking figure instead of merely atmospheric.

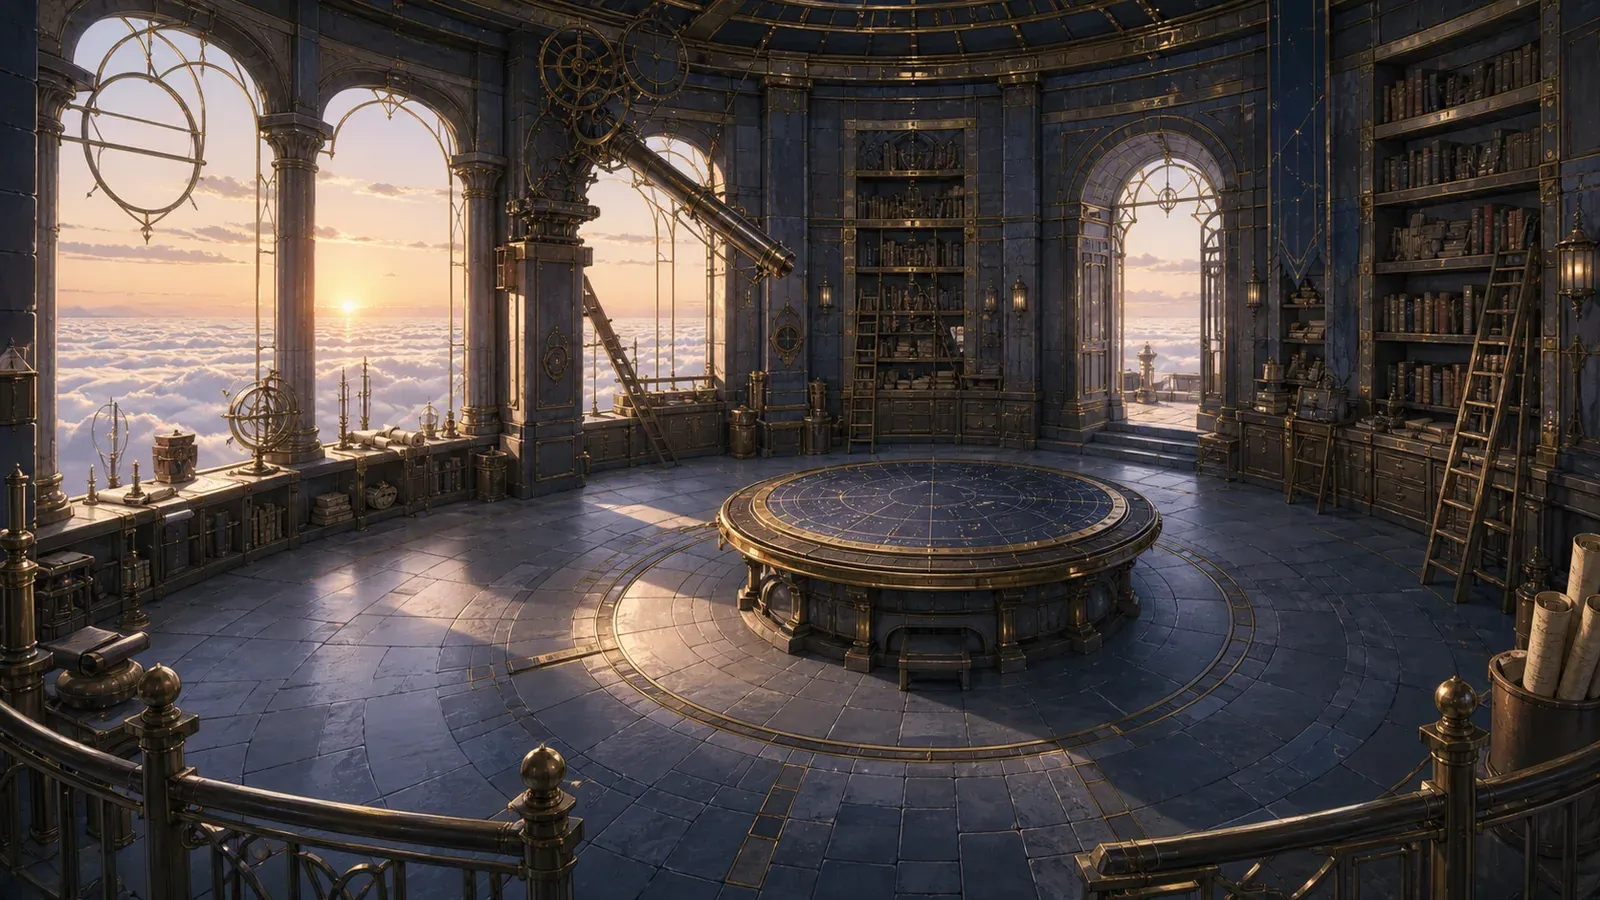
Empty fantasy observatory archive background with a central star table and character-safe floor space

High three-quarter view · two-point perspective · medium-deep focus · sunrise · 16:9

Observatory dialogue interior

The room has named landmarks, credible walking paths, and restrained value contrast. An open floor beside the table creates a place for two speaking characters without covering the location’s identifying features.

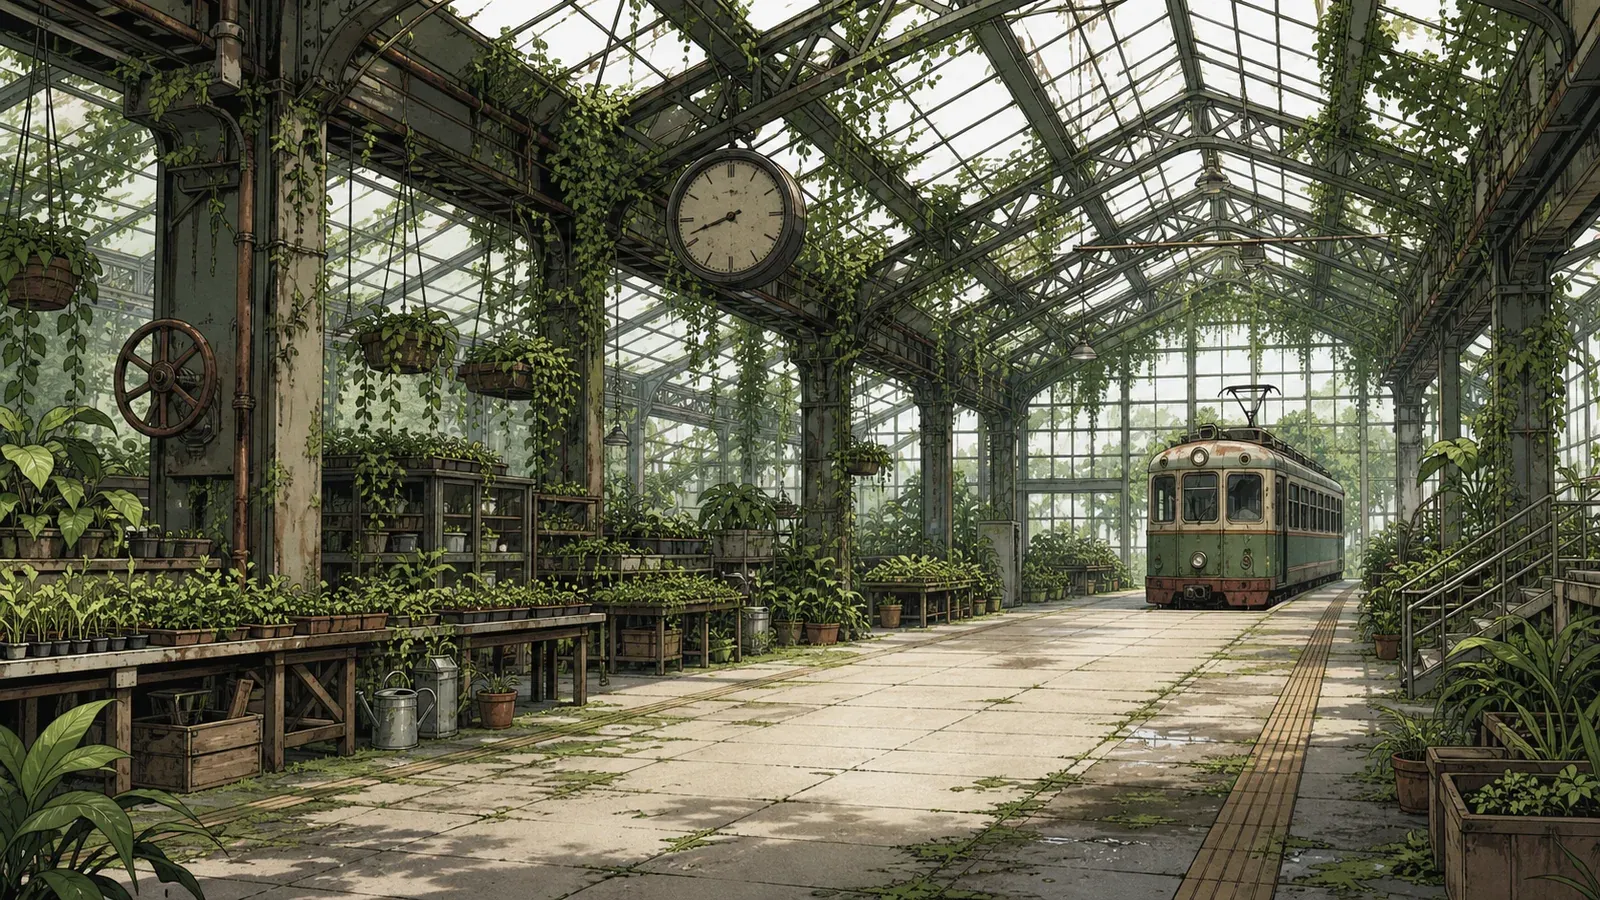
Empty manga-style greenhouse train station background with three repeatable landmark anchors

Low eye level · diagonal perspective · medium focus · overcast daylight · 16:9

Reusable greenhouse station

The clock, tram, and valve column form a compact landmark set. Repeating those words in later briefs can improve recognition, while each new image still needs continuity review because generation does not create a persistent 3D location.

Primary workflow

AI background generator for comics

A comic background has to carry story information while leaving room for the action. A beautiful environment that hides a hand gesture, flattens a chase route, or fills every quiet wall with detail is often a poor panel background. The workbench therefore begins with production decisions rather than a single unrestricted prompt. Name the place and its narrative function. State whether the scene is an establishing view, a dialogue location, an action lane, or a transition panel. Then describe the permanent anchors a reader should recognize: the noodle-shop awning, the broken station clock, the central archive table, the cliff window, or the distinctive service door.

Camera direction turns that location description into a panel. Eye-level framing usually feels observational; a high view can expose routes and relationships; a low view makes foreground structures dominant. One-point perspective can guide the eye down a corridor, while two-point perspective works for a building corner or an interior seen diagonally. The focal-depth field is deliberately separate. Deep focus keeps location evidence readable from foreground to background. Medium focus gives the cast a clearer visual zone. Shallow focus can support an intimate close scene, but it may weaken the environment as a reusable reference.

Character-safe negative space is not a generic request for an empty image. It should name a usable region and explain what must stay out of it. For example: leave the lower-right floor clear for a full-body figure, keep the wall behind two seated characters low contrast, or preserve calm sky above the roofline for a balloon. This does not automatically composite a character. It gives the image model a staging instruction so the downloaded background is easier to bring into a page layout, paint file, or panel generator.

Prompting method

Create anime backgrounds from text

Text-to-background work improves when the description distinguishes stable structure from temporary conditions. Stable structure includes room shape, entrances, windows, road direction, large furniture, terrain, and landmark props. Temporary conditions include time of day, weather, practical lights, seasonal foliage, smoke, crowds, and damage. Put permanent geometry in the location field and the temporary state in time and weather. That separation makes the brief easier to reuse when a later panel returns to the same place under different light.

Avoid adjective piles such as “epic, cinematic, detailed, beautiful anime city.” They communicate taste but not construction. Replace them with evidence an image can show: a narrow service alley descending toward an elevated rail line; four-storey mixed-use buildings; shallow shopfronts; exposed drainage; one amber noodle counter; wet asphalt after a short evening shower. The second version gives perspective cues, scale references, materials, and a controlled light source. It also gives an artist concrete facts to correct if the generated result misunderstands the place.

Style should describe rendering language instead of borrowing a living artist or copyrighted franchise. Useful direction includes hand-painted anime background, crisp graphic manga environment with selective cel color, restrained watercolor storybook scene, grounded ink-and-wash architecture, or simplified webtoon background with clean value groups. State line weight, texture density, and color treatment only when they matter to your sequence. The workbench combines these choices into an editable brief; it does not hide the exact instruction behind a one-click preset.

Character fit

Plan a background around a character’s visual direction

This page does not upload or inspect a character image, so it cannot truthfully match a reference automatically. The practical workflow is to translate visible character facts into short text anchors. Record the character’s apparent scale, camera height, dominant palette, light direction, edge treatment, and rendering density. If a character concept uses a cool teal coat with warm brass details, a dark environment can reserve a mid-value zone behind the torso and repeat only a small warm practical light. If the character is drawn with crisp cel edges, avoid a background whose foreground texture is so sharp and noisy that the figure loses hierarchy.

Perspective fit begins with the expected placement of the character’s feet and horizon. A standing adult placed near the lower third needs a plausible ground plane and an eye line that agrees with the selected camera height. A seated conversation requires furniture with believable seat height. A low-angle hero panel needs vertical convergence and enough headroom. Describe these relationships in the negative-space and camera fields before generation. After downloading, test the background under the real figure at final panel size; do not judge compatibility only from a large isolated image.

Lighting fit is another review step rather than an automatic guarantee. State the key-light direction, softness, and color in the weather field, then compare it with the character artwork. You may need to repaint cast shadows, reduce background contrast, or grade one asset so both belong to the same panel. For automatic image-reference transformation, use a workflow that actually accepts the image. This tool intentionally keeps its claim narrower: it turns written compatibility notes into one environmental proposal.

Location continuity

Plan recurring locations across separate camera angles

A reusable location starts with a small location bible. Give the place a name, one-sentence function, rough footprint, fixed entrances, major materials, and three to five landmark anchors. Write spatial relationships explicitly: the archive table sits under the dome; the west door opens toward the cliff balcony; the ladder rail follows the north shelving; the large round window faces sunrise. Save that text outside the generated image. It is the durable source that can be copied into a later brief when you request another view.

Generate angles one at a time. Keep the same anchor paragraph and style language, then change only the camera field and the staging requirement. Label each result with the angle, time, and approved facts. Compare door count, window placement, landmark orientation, material changes, and scale before accepting a second view. If an important object moves, choose which version becomes canon and correct the other manually. Generative image jobs are independent; repeating a prompt can improve resemblance, but it does not build or rotate a hidden 3D scene.

For exact multi-angle continuity, create a floor plan, block the space in 3D, draw perspective guides, or have an environment artist establish measured views. The generated backgrounds can still reduce exploration time: they help choose the visual identity, locate staging zones, test lighting states, and identify which details need formal construction. Treat them as proposals feeding a controlled pipeline, not as an automatic replacement for spatial design.

Start with a background brief

Field guide

How each background control changes the result

Setting and location carries the physical facts. Include environment type, size, materials, entrances, pathways, essential furniture, terrain, and landmark objects. Time and weather controls temporary illumination and atmosphere; say where the key light comes from and whether surfaces are wet, dusty, fogged, snowy, sun-bleached, or unaffected. Camera angle and perspective governs horizon, vanishing behavior, and which surfaces are visible. These three fields should agree. A cramped room described with an extreme aerial view, for example, may expose geometry you never defined.

Focal depth is both a photographic and a drawing decision. Deep focus is useful for establishing panels, investigations, maps, and environments that must be understood. Medium focus lets the background remain legible while reserving hierarchy for figures. Shallow focus can imply intimacy or speed but may produce blur that is hard to edit. Character-safe negative space tells the composition where restraint is valuable. State position, approximate size, and what should remain simple; “leave space” alone is ambiguous.

Style describes the mark-making and finish. Aspect ratio sets the canvas and strongly affects available staging room. A wide panel supports travel, geography, and multiple speakers. A square image can suit an insert or social crop. A portrait frame can serve a vertical reveal or webtoon beat, but tall architecture needs deliberate foreground and headroom. The generator returns one flat raster image at the selected ratio. Cropping later is possible, yet a new crop can remove the very vanishing point or safe zone that made the composition useful.

Panel production

Move the generated background into a comic workflow

Download the completed raster and store the validated brief beside it. Give both files a production name that includes location, angle, light state, and version. Before drawing characters, place the background at final panel dimensions and mark trim, bleed, balloons, and figure silhouettes. Check whether important lines run through faces, whether high-contrast lamps compete with dialogue, and whether floor perspective supports the planned foot positions. Background approval should happen at reading size, not only at full-resolution zoom.

Use a panel generator when the next task is combining a scene description with narrative action. Use camera-angle control when the unresolved decision is viewpoint rather than environment identity. Use a storyboard generator to test where the location appears across a sequence before producing more polished versions. These are adjacent jobs with different controls. Keeping them separate prevents a background page from becoming a vague all-purpose image prompt.

Generated detail often needs subtraction. Simplify repeating window lines behind a face, soften texture under a speech balloon, clarify a doorway needed for the next panel, and repair impossible tangencies. If lettering arrives late, preserve more calm surfaces than you think you need. If color grading changes across a chapter, keep an ungraded master. The flat output has no editable depth layers, so significant parallax, camera movement, or relighting requires manual separation, repainting, or a different production asset.

Failure recovery

Fix weak background generations without losing the brief

When architecture becomes incoherent, reduce the number of rooms and state a simpler footprint. When perspective bends, use one camera system and remove conflicting phrases such as aerial close-up or telephoto wide-angle. When the image fills the staging zone, name its exact location and prohibit high-contrast objects there. When the scene feels generic, add three functional landmarks and one material rule instead of more mood adjectives. Make one controlled revision at a time so you can identify which instruction changed the result.

A generation may also fail before it returns an image. The page checks sign-in by reading the existing generation history, shows the credit balance when available, and preserves the written fields in browser session storage. If the account lacks credits, the brief remains available while you visit pricing. A queued or running job is polled on this page. If the final provider attempt fails, the existing worker reports the failed state and refunds the charged job according to the current queue behavior. You can then retry without rebuilding the specification.

Honest limits

What one generated background cannot deliver

The result is one raster image. It does not include separate foreground, midground, lighting, shadow, line, and paint layers. It is not a layered PSD, vector scene, 3D mesh, camera file, floor plan, measured elevation, or animation-ready set. Objects hidden behind walls are not modeled, and text inside the image may be unreliable. Request non-legible signage or add lettering after generation when typography matters.

The tool does not guarantee exact geography across independent jobs. It does not train a persistent location model or rotate the first result. It also does not inspect an uploaded character reference because there is no reference-image field in this task. Written anchors can improve alignment, but human review remains responsible for perspective, scale, lighting, palette, and continuity. These limits are important production facts, not small-print exceptions.

Use the page when you need a concrete environmental proposal, a visual-development target, a panel-ready base that can be corrected, or a location idea to test before formal construction. Do not use it as the sole source for architecture that must be physically accurate, legal evidence, historical reconstruction, safety planning, or continuity-critical animation. A narrower claim makes the output easier to evaluate and the next production decision clearer.

Practical background questions

What does the AI background generator create?

It creates one flat raster comic or anime environment from a validated text brief. The brief covers location, time and weather, camera and perspective, focal depth, character-safe negative space, style, and aspect ratio.

Can I generate a background without characters?

Yes. The generation request uses panel mode with no character object and explicitly asks for an environment-only result. Image models can still make mistakes, so inspect the result before production use.

Can it match an uploaded character image?

No. This page has no reference-image upload. You can describe the character’s scale, palette, light direction, edge treatment, and intended placement as text, then review the downloaded background under the real character artwork.

Will multiple camera angles match exactly?

No. Each image job is independent. Reuse a written location bible and landmark anchors, generate one angle at a time, and reconcile differences manually. Exact continuity needs controlled drawing or a 3D scene.

Does the download include layers or a PSD?

No. The existing image queue returns one raster image. It does not return layers, a PSD, vectors, depth maps, a 3D model, or an editable camera.

Why define character-safe negative space?

It reserves a low-detail, lower-contrast region for a figure or speech balloon. Specify where the space belongs and what should not occupy it.

Does building the background brief use credits?

No. Field validation and the editable specification run before generation. Sign-in and the credit cost of the active image model apply when you queue the raster image.

What happens when the image job fails?

The existing worker retries eligible errors and refunds a job after its final failed attempt. The page keeps the written brief in session storage so you can revise or retry.